Content
Tutorial:
How do I enable Let’s Encrypt SSL Certificate on my domain?
Let’s Encrypt is a free, global Certificate Authority (CA) which allow you to enable secure HTTPS connections between your web server and your visitors’ web browser to prevent sensitive information from eavesdropping, data tampering, and message forgery. It is valid for 90 days.
Below are the steps to enable Let’s encrypt Free SSL Certificate on your domain. Please note that we are installing SSL on a sub-domain to demonstrate the process.
1. Login into Plesk Control Panel.
Login to Plesk (control panel) with your username and password that you received in a welcome email.
2. Click on the Website & Domains option.
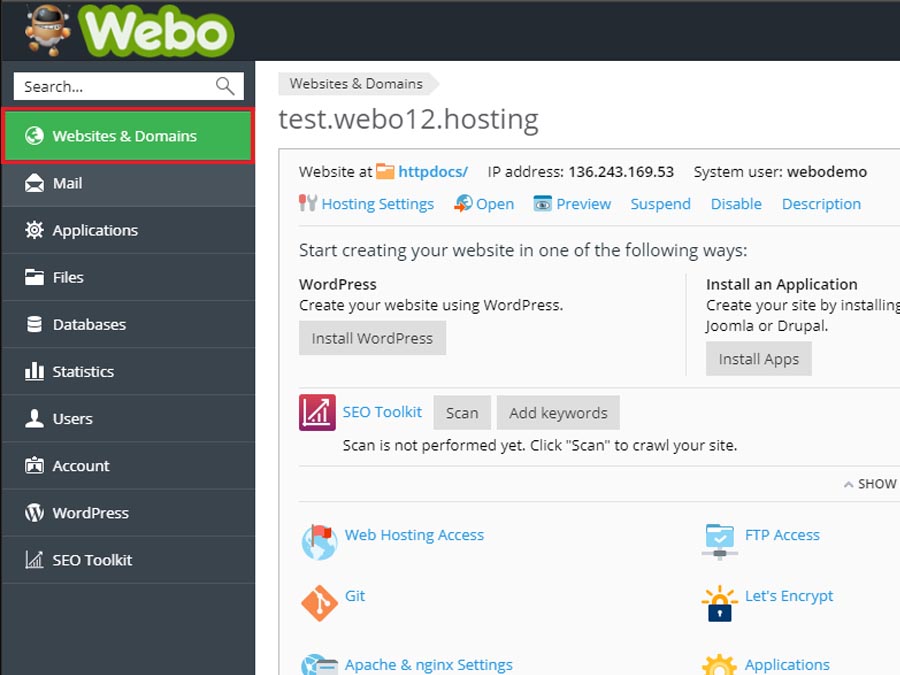
3.Locate your domain
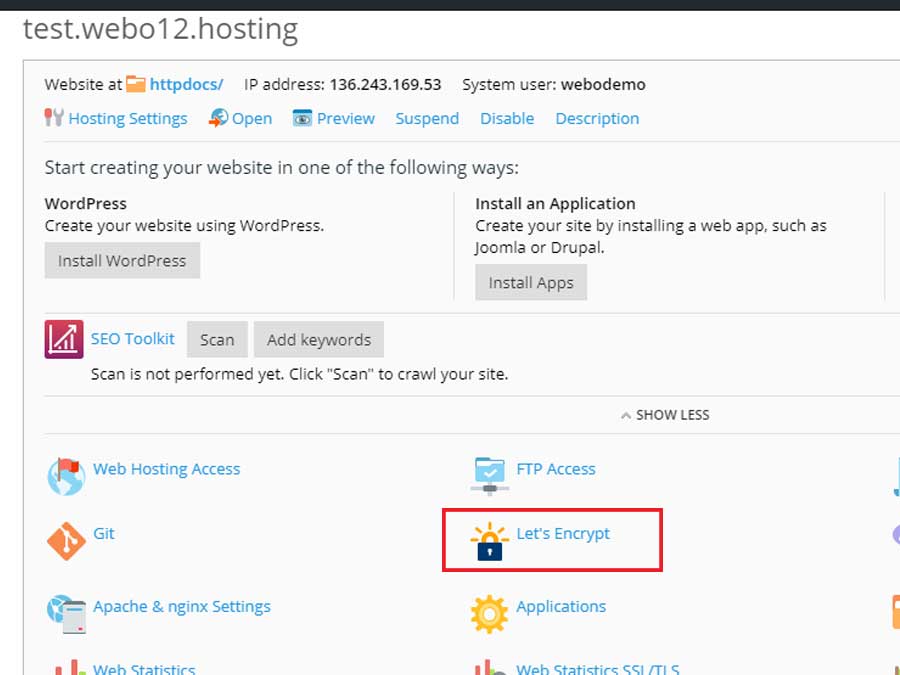
Locate the domain on which you want to enable and click on Let’s Encrypt option.
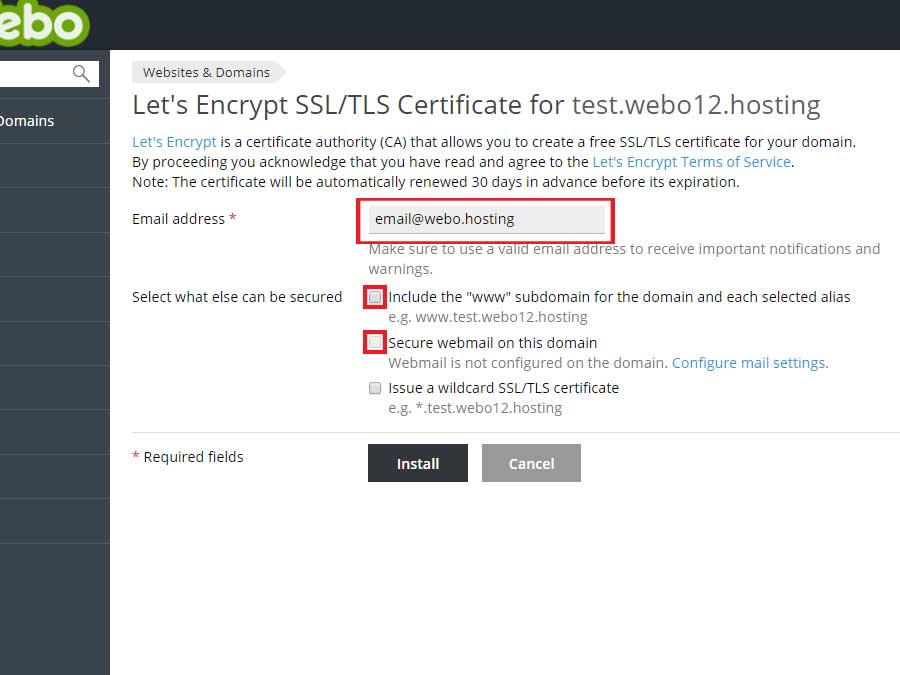
4. Installation
Enter a valid email address in the field and check the box “Include a “www” subdomain for the domain and each selected alias”, if you want the SSL Certificate to cover the domain both with and without the “www” prefix, and then click on the install button.
Note: If you don’t check the include a www… box, then your certificate will be valid only for yourdomain.com. If you do check the box, both domain yourdomain.com and www.yourdomain.com will be covered.
5. Completing Installation
Once the installation is completed, you will be returned to the hosting page where a success message will let you know the process is completed.
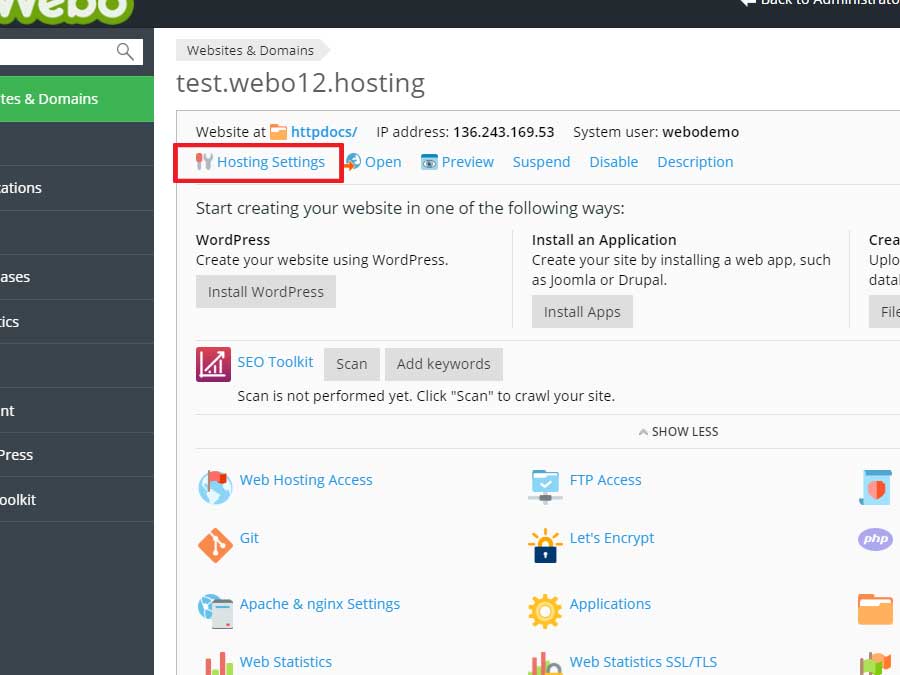
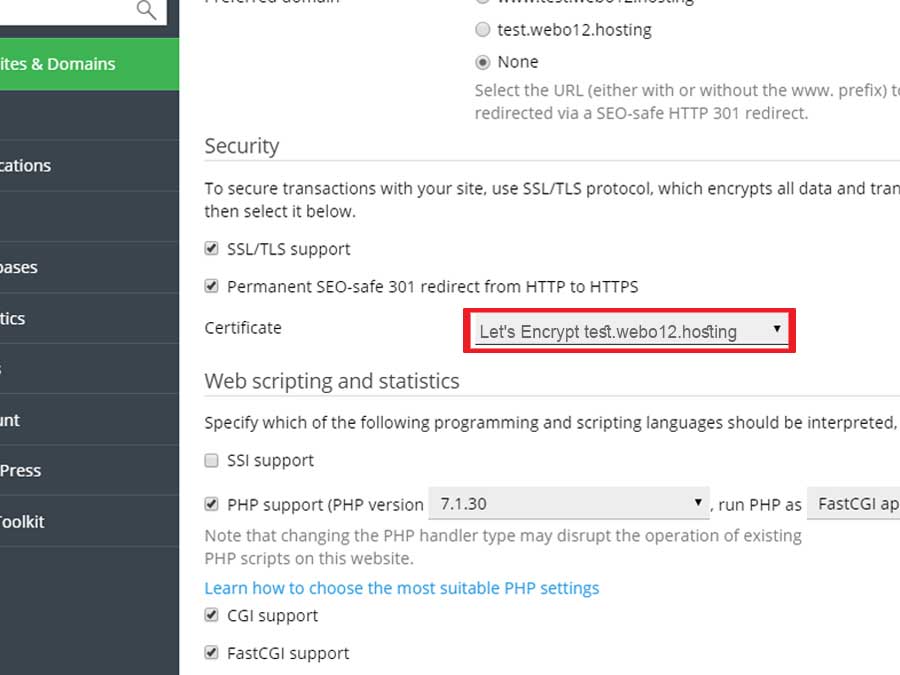
6.Enabling SSL certificate
Click on the Hosting Settings.
Under the security section, the below options need to be selected and then click on the OK button to save it.
SSL/TLS support
Permanent redirect from HTTP to HTTPS
Let’s Encrypt Certificate
7.Testing your SSL
Now you can open your website with https://yourdomain and try if your SSL certificate works. If not you can always contact webo.hosting support team for help.

